Tuesday, September 30, 2014

Clan night tonight. 9pm PT. Destiny.

Notice: This will be the last week that we will have "open" clan night. I'll be off next week, but starting in 2 weeks clan night will have minimum level requirements. I hate to be exclusionary, but the way Destiny is designed - the game is not playable unless you have leveled up. If you aren't within 3 levels of the top player you're partied with, you can't play the game.

If you'd like to continue playing Destiny on clan nights, please put the time in and level up your character. I am more than happy to help folks level up during the week. I am on almost every night.

Current clan standings:
- gtdroptop: lvl28 - 85 hrs played
- OmniscientDeath: lvl26 - 68hrs
- CoolerSopranos2: lvl27 - 51hrs
- Beer4Porter: lvl18 - 12hrs
- o DeadEye o: lvl5 - 2hrs

Friday, September 26, 2014

Aladdin's Cave

Reposted from Penny Arcade


Wednesday, September 24, 2014

Queen's Wrath

The Queen's Wrath limited-time event is running now through October 6 (two weeks only).  Here's what you need to know:

  • There are six purple bounties available per day from the Bounty Tracker - 4 are PVE, 2 are PVP
  • Finishing a purple bounty unlocks a lvl24 story mission with the Epic modifier (no auto-respawn, must be revived by teammates) and two random additional modifiers
    • This means you must be at LEAST lvl21 to even play the story missions, but recommended to be lvl24 or higher
    • We saw ammo restriction (less ammo drops) and solar damage modifiers - means solar weapons from both good and bad guys do 3X the damage as normal : 2,422 crit damage from solar sniper, or 1-shot deaths from Hobgoblins
  • Completing the story mission results in a guaranteed Legendary purple armor piece - either a helmet or a chest piece
    • It's random if you get helmet or chest armor
    • You can do all six bounties each day to get six armor pieces
    • There's only one specific helmet and one specific chest you can get, so you can dismantle the duplicates for mats (materials)
  • Completing the bounties and missions gains you rep with the Queen's faction, you need to level up rep to get to the items, weapons and armor that the Queen's emissary will sell to you
It took us about 2 hours to knock out 3 bounties and missions - so it's probably 4-5 hours to do them all.  Plan accordingly.
  • It's a minimum of 2 days to reach level 1 rep if you do all 6 purple bounties - At our pace, it will take 4 days at 3 bounties a day
  • Min 5 days to reach level 2 rep for Queen's weapons and armor - 10 days at our pace
  • Min 10 days to reach level 3 rep for exclusive shader and emblem - Unreachable at our pace

How Levels affect your gameplay and WHY they're are so important

reposted from reddit

It's very simple, you do less damage and take more damage from monsters that are higher level than you. That is why it's important that you're at least lvl 28 when doing the raid, since the mobs are lvl 28, you will do less damage to them if you are below lvl 28
here's a very simple test I conducted (my guardian is lvl 28):

  1. Buy or obtain white/green/blues so you can change your light level (in this case I had gear where I could change my level to 21, 23, 24, and 28)
  2. Do any story mode at lvl 24 heroic (note, the mobs are lvl 24)
  3. equip your gear so you're lvl 28, take ONE shot at a mob and note the dmg (383 with a legendary lvl 20 hand cannon in my case to an acolyte)
  4. equip gear so you're lvl 21, take ONE shot at the same type of mob with the same weapon (I did 184)
  5. equip gear so you're lvl 23, take ONE shot at the same type of mob with the same weapon (I did 261)
  6. equip gear so you're lvl 24 (same lvl as the mob) take ONE shot at the same type of mob with the same weapon (I did 383)
final results doing damage with the same EXACT weapon at the same TYPE OF MOB (lvl 24 acolyte) by just changing my light level
  • Light 21: 184 dmg
  • Light 23: 261 dmg
  • Light 24: 383 dmg
  • Light 26: 383 dmg
  • Light 28: 383 dmg

as you can see, your damage SCALES DOWN TO THAT OF THE ENEMY if you're higher lvl than it (that's why your bullet damage text is grey) and you do reduced damage if you're not the level of your enemy (the same goes for your armor, it scales down to your enemy and you'd take the same damage at lvl 28 as you would lvl 20 from a lvl 4 mob on earth, this is harder to test but trust me, I've done some visual tests and confirmed it)

you can only do damage to mobs that are no higher than 3 lvls above you and you take a penalty in damage for it (that's why you can't even choose a lvl 28 mission if you're lower than lvl 25, you wouldn't do any damage)
  • 4 lvl or lower below mob: 100% damage penalty
  • 3 lvl below mob: ~52% damage penalty
  • 2 lvl below mob: ~42% damage penalty (guesstimate since I didn't have the gear to put me to lvl 22)
  • 1 lvl below mob: ~32% damage penalty
  • 0 lvl below or higher than mob: 0% damage penalty

TL:DR your light levels affect BOTH your damage output and how much damage you take only UP TO the level of the mobs (i.e. if you're lvl 28, you'll do the same damage and take the same amount of damage from lvl 20 mobs as you would from lvl 24 mobs, there is ZERO difference)

so in conclusion that is why it's so important to be at least lvl 28 in raids and as I stated in my original post[2] , lvl 20 bounties would be EXACTLY the same as lvl 4 bounties from earth... there is no difference (as long as you're lvl 20+)
this is also why those lvl 24 strike playlists used to be hard at lvl 22, but aren't anymore at lvl 24+, it's because not only are you taking less damage (capped at what you were taking at lvl 24) but you're also doing more damage even though you're using the same exact weapon
this is also why you die as fast doing earth lvl 4 missions as you do doing lvl 18 mars missions even though you're lvl 28 with 1400+ armor, it doesn't matter up to the level of the mobs

Tuesday, September 23, 2014

Clan night tonight. 9pm PT. Destiny.

New content available today.


Thursday, September 18, 2014

Elemental Weapon Damage

Based on content found on stackexchange:

Each element is tied to a certain enemy faction. and their shields is that element. using the element on them deals bonus damage and helps take down the shields much faster.

Arc Damage iconCaptain
  • Fallen
    • Key shielded enemies: Captains
    • Susceptible to: Arc damage, signified by blue shields
    • Found mostly on: Earth (but all over too)
Fire damage iconHive Thrall
  • Hive
    • Key shielded enemies: Knights, Wizards, Shanks
    • Susceptible to: Solar damage, signified by orange shields
    • Found mostly on: Moon  (Earth too)
Void Damage iconVex
  • Vex
    • Key shielded enemies: Hobgoblin, Minotaur, Praetorian
    • Susceptible to: Void damage, signified by purple shields (exception: some Harpies have arc shields)
    • Found mostly on: Venus
Fire damage iconCabal Render
  • Cabal
    • Key shielded enemies: Centurion, Colossus
    • Susceptible to: Solar damage, signified by orange shields
    • Found mostly on: Mars
Most of the time you won't need the element to deal damage, but in a few rare cases (I've noticed one area so far with Vex Harpies with Arc shields that only take damage from Arc attacks).
Your primary weapon will always be Kinetic damage, none with elements have been discovered yet (if they do exist). Your special and heavy weapons can and should have an element. Preferably one of each element so you are prepared for any encounter.

Each subclass also focuses on a specific elemental damage:
  • Kinetic: Kinetic is the base damage type and can be considered "physical" damage.
  • Arc: This elemental damage type is related to electricity and has an area of effect. The Hunter:Bladedancer and Titan:Striker subclasses focus on Arc damage.
  • Solar: This elemental damage type is fire damage and has a chance to ignite enemies. The Hunter:Gunslinger and Warlock:Sunsinger subclasses focus on Solar Damage.
  • Void: This elemental damage type is related to gravity and dark energy. The Titan:Defender and Warlock:Voidwalker subclasses focus on Void damage. 

Wednesday, September 17, 2014

Destiny: A Guide to Life After 20

Reposted from gameskinny:

Destiny: A Guide to Life After 20

by
So you just hit level 20 in Destiny, now what? A lot, that's what! This game is structured like an MMO. For those that don't have experience with that genre, it basically means that once you hit max level, the real game begins.
You ever notice that legendary level 20 gear when shopping at a vendor? Well, now you ca get it, sort of. I'll explain everything you need to know about what to focus on after reaching level 20.
For more tips and guides, check out my Destiny Quick and Dirty Beginner's guide.

This guide will cover Destiny after level 20 including:

  • Level 20 Legendary Gear - What it is and how to get it.
  • Vanguard, Crucible, and Faction Gear - Specifics on getting each type.
  • Marks and Reputation - What they are and how to get them.
  • Materials - How materials are important to you at level 20.

Level 20 Legendary Gear

The first thing you should do after getting 20, and even before, is look at all the gear vendors. There 7 vendors that sell legendary level 20 gear:
  • Vanguard Quartermaster - Sells weapons only
  • Class-specific Vanguard - Sells armor only
  • Crucible Quartermaster - Sells weapons only
  • Crucible Handler - Sells armor only
  • Dead Orbit - Sells weapons and armor
  • Future War Cult - Sells weapons and armor
  • New Monarchy - Sells weapons and armor
Each vendor sells gear with different stats on them, that's why you want to look at all of them. Whichever vendor sells gear with the stats you want, that's where you want to focus getting reputation with.

Also, you'll notice that you have a Light level. Gear after level 20 will have "Light" on it. This number increases your Light level, effectively pushing you past level 20. Some things in the game require you have a higher Light level. For example, the weekly heroic strike is listed as level 22.

Vanguard Gear

The Vanguard Quartermaster and Vanguard for your class require Vanguard and marks and rep to buy. Armor requires rank 2 in rep and several Vanguard marks. Weapons require rank 3.
When at a vendor, you can check how much rep you have and how much you need to reach the next rank. This only applies to the vendor you're at.
You can get Vanguard marks by:
  • Completing Strikes using the Strike playlist. The level 20 and higher playlists all give Vanguard marks
  • Completing the daily heroic story missions
  • Completing the weekly heroic strike missions
You can only get a total of 100 Vanguard marks per week, so be sure to get them all before the weekly reset.
Every day there is a new heroic story mission. When you complete it, you get 5 Vanguard marks.
Every week there is a heroic strike mission. When you complete it, you get 3 Vanguard marks, 150 rep, and 3 Strange Coins. The coins are used to buy from a Black Market vendor, but I'll cover that later. The heroic strikes reset every Tuesday.

You also gain Vanguard rep in several ways:
  • Completing patrol missions
  • Completing Vanguard bounties
  • Completing Strikes from the Strike playlist
  • Completing weekly heroic strike missions
You can't buy that great gear until you have a high enough rep rank and Vanguard marks. 

Crucible Gear

[Does not apply to Bada Bing]

Faction Gear

[Does not apply to Bada Bing]

Materials

Now that you're level 20, those materials you've been picking up have a use. every planet has a specific material unique to them. For example, Earth has spinmetal.
You can collect 50 of these and turn them into either the Crucible quartermaster or the Vanguard quartermaster for glimmer and either rep or marks. It is random whether you get marks or rep. Be sure to turn it into the vendor you are focusing on getting gear from.
Strange Coins are used for the Agent of the Nine vendor. The vendor only appears on the weekends and sells Exotic gear and other rare items.
Each piece of armor requires at 13 Strange Coins, so be sure to hold on to them and always complete the weekly heroic strikes. There will be one piece of armor for each class and they give an upgrade to one of your abilities.
He also sells an Exotic weapon and engram for 23 coins, items that speed up weapon progressions for 30 minutes for 1 coin, and sparrow upgrades for 13 coins.
You can only have one piece of Exotic armor and one Exotic weapon equipped at a time, so keep your Legendary gear in case you get a new Exotic piece you want more.

This guy looks strangeley familiar...
That's it for what to do in Destiny after reaching level 20. Don't forget, you still gain experience for your class skills after 20, so you'll have plenty to do to unlock everything.
Please visit my Quick and Dirty Beginner's guide if you need help with anything else related to Destiny. If you have any other questions, or see something I missed, feel free to let me know in the comments.
Originally Published Sep. 11th 2014

Tuesday, September 16, 2014

Clan night tonight. 9pm PT. Destiny.

As usual, I will run an Xbox Live chat party and we will have separate Destiny Fireteam parties.  Fireteams are limited to 3 players in Destiny for Story and Strike missions.  When everyone gets to level 20, we will be able to have 6 player Fireteams for Raids.

Because Fireteams are limited to 3 and we have more than 3 people that could play, this is how we will run clan night matchmaking:

  1. Priority to those on-line and in the Xbox Live chat party on time.  I will aim to kick games off as quickly as possible.  We will pick you up if you are late, but you may have to wait a few minutes for Fireteams to finish their current mission.
  2. I will matchmake players based on character level.  For now, lowest ranked character will be the Fireteam leader so that missions are properly leveled for them, and they aren't able to pick missions they can't play.  I will ask you for the level of the character you feel like playing at the time.
  3. We'll generally try to have Fireteams of 2-3 people, and try to avoid leaving odd people out when possible.
These policies will change when raids become available to us as a clan.

-- jbw

Monday, September 15, 2014

Clans


Reposted from ign

Clans in Destiny are meant to be (according to Bungie) "intimate clusters of gamers who play together. Our hope is that everyone in a clan knows every other member."

To join a clan, sign into Bungie.net and associate your Xbox Live account to your login. Then navigate to the Clans home page and click "Request Join." I've linked to the Bada Bing clan for your convenience.
The maximum number of people that can join a Clan and still receive the in-game Tag is limited to 150 across Xbox and PlayStation. However you can still join the Group.
Groups are created at the same time a Clan is created. Once you join a clan, you also join the group of the same name. This is where you can talk with friends in a private area outside of the general forums.

Sunday, September 14, 2014

All Gold Chest Locations and Dead Ghost Hints

Reposted from reddit

Tower Dead Ghosts:

Number Area Hint
1 Tower Plaza - Tower Watch Hey... Where do these stairs go?
2 Tower North The Speaker knows many secrets.
3 Tower Plaza - Traveler's Walk "I can see the frontier from here."
4 Hall of Guardians You passed it on your way in, don't miss it on your way out.

Earth Gold Chests:

Number Area Location
1 The Steppes to Dock 13 From the Steppes, enter the building that leads to Dock 13 and move into the next room. A Gold Chest rests in plain view atop a desk.
2 Forgotten Shore At the base of the Forgotten Shore Cliff, located just below the Terrestrial Complex, a Gold Chest lies next to the water. You can walk or even drive with the Sparrow through the lighter colored water.
3 Forgotten Shore to Mothyards Enter the path from the Forgotten Shores toward Mothyards, and follow it as it curves left and then back right. Turn to the right side and spot the water falling in front of a cave. A Gold Chest sits inside.
4 Lunar Complex Inside the room where you took down the Hive Wizard during The Dark Within. Jump onto the room on the left and search the back side to find the chest.
5 Devils' Lair This Gold Chest is accessible only during the Devils' Lair Strike. Either during the fight with Sepiks Prime or just after defeating it, search under the right platform.

Earth Dead Ghosts:

Number Area Location
1 Breach Got your gun? Watch the ceiling.
2 Breach Stand in the puddle, look left.
3 The Divide Look up...and follow the signs.
4 The Divide Round and round.
5 The Steppes Shed your fears.
6 The Steppes to Mothyards Watch your throttle or you'll miss the ditch.
7 Mothyards Not all caves are on even ground.
8 Lunar Complex Search the dark, to find the Light.
9 Skywatch Nice view...but you're not alone.
10 Terrestrial Complex Open locker.
11 Rocketyard Above the Servitor.
12 Forgotten Shore Gonna need a bigger boat.
13 Refinery Find a small room. Look for the Light.
14 The Blast The Devil Walker guards more than a locked door.
15 The Grottos Just beyond the unseen door.
16 Forgotten Shore: Bunker RAS-2 Search the bunker.

Moon Gold Chests:

Number Area Location
1 Temple of Crota Enter the temple, drop to the lowest floor, and spin to the right to find the exit. Follow the path further into the Hive temple. Cross the bridge into the ship and continue out the right side - stopping at the end of the ramp. Look down to the right to spot a small platform with a Gold Chest.
2 Archer's Line to Hellmouth As you make your way to Hellmouth from Archer's Line, look for a rock formation on the left just before the short bridge. Look behind it to find this Gold Chest.
3 Archer's Line to Hall of Wisdom Climb the hill across from the starting point in Archer's Line, cut through the debilitated dome structure, and follow the path into the Hive fortress. Take the spiral ramp down to the bottom of the cave or simply drop down. Enter the water to the right of the Hall of Wisdom entrance to find the chest.
4 The World's Grave Find this Gold Chest inside the final room of The World's Grave. Drop into the water right away and search along the rocky wall to get your reward.
5 The Summoning Pits this chest is only accessible during the Moon Strike, The Summoning Pit. Move over to the lower platform at the far end of the arena and search between the two staircases.

Moon Dead Ghosts:

Number Area Hint
1 Archer's Line Acceleration.
2 Archer's Line "Crack beyond the dome. "
3 Anchor of Light Climb the girder.
4 Temple of Crota You gotta go down, to get back up.
5 Hellmouth Explore our past.
6 Circle of Bones Complete the circle.
7 Gatehouse Look to the depths.
8 Hall of Wisdom Edge of the abyss.
9 Shrine of Oryx Deep within, upon the bones.

Venus Gold Chests:

Number Area Location
1 Shattered Coast to Ishtar Academy Drop into the hole in the Shattered Coast and follow the tunnel toward Ishtar Academy. Before you reach the bend, look back to find a Gold Chest next to a pillar.
2 Campus 9 After you enter Campus9 from the Waking Ruins, run over to the far building, next to the waterfall. A Gold Chest sits next to the structure on the other side.
3 N/Gen Branch Enter N/Gen Branch from Ishtar Commons and head to the right. Move into the small building and search the central cubicles for the Gold Chest.
4 Winter's Lair In Winter's lair, follow the trail around the outside of the cavern until you reach the upper overlook. Step out onto the horizontal pole and jump over to the the right ledge to collect this Gold Chest.
5 The Cinders In the Cinders, fight your way onto the ketch. Turn to the right and move to the very back. Drop down to the lower ledge to find the Gold Chest.

Venus Dead Ghosts:

Number Area Hint
1 Headlands Third puddle to the left.
2 Shattered Coast backseat driver.
3 Ishtar Academy Bookworm.
4 Ishtar Cliffs Over the muddy waters.
5 Waking Ruins Take the high ground...then go a bit higher.
6 Campus 9 Let your exploration reach new heights.
7 Ishtar Commons Under the tarp. Above your head.
8 Ishtar Commons small dark rooms.
9 Winter's Lair Leave no dark corner unchecked.
10 Ember Caves It's not called Ember "Caves" for nothing.
11 Hall of Whispers It's in here...somewhere.
12 N/Gen Branch "AUTHORIZED PERSONNEL ONLY"
13 Dig Site 4 Wash. Rinse. Repeat.
14 Endless Steps Good luck.

Mars Gold Chests:

Number Area Location
1 The Barrens From the Barrens landing zone, go over to the circular Cabal outpost that sits near the exit to Scablands. The Gold Chest sits atop a stack of crates.
2 Barrens to the Hollows In the tunnel between Barrens and the Hollows, look for a small opening above just before you emerge downtown. Hop into the hole, and look to the right to find the chest.
3 Dust Palace Inside the Dust Palace, where the first door is opened in the Dust Palace Strike, look for the door labeled with the number 3. Behind the reception desk is the Gold Chest.
4 Iron Line Inside Iron line, at the giant gate that leads to the Legion's Keep, run along the left walkway. Jump onto the big pipes in the corner, and turn around. Leap up to the walkway on the left and follow it all the way to the other side to find this chest, neatly tucked into the corner.
5 Tharsis Junction Inside the subway at Tharsis Junction, look fro the Vex gate in the corner behind the train cars. Behind it is a small room. Go inside, and slip behind the fencing in the far corner. Follow the path to collect the chest.

Mars Dead Ghosts:

Number Area Hint
1 Barrens There is heated combat at its doorstep.
2 Scablands Wonder what's on the other side.
3 Firebase Rubicon Where the lonely tree grows.
4 The Hollows "CB" marks the spot.
5 Dust Palace Window washer.
6 Overwatch Get a desk job.
7 Giants' Pass Root of the problem.
8 Valley of the Kings Climb, beyond the outpost - not too high, not too low.
9 Valley of the Kings Skirt the edge.
10 The Drift Signs of life.
11 Buried City Get some height to get Off World.
12 Freehold Station Like a tiny star in the night.
13 Tharsis Junction In the shadows of the M line.
14 Iron Line It hides above.
15 Trenchworks Hug the walls.
16 The Legion's Keep Column of stone.
17 Upper Garden ?????
18 The Black Garden ?????

Destiny: Class and Subclass Overview

Reposted from gameskinny:

Destiny: Class and Subclass Overview

A brief description of every class and subclass. Also contains the details on unlocking advanced subclasses.
by

Destiny is a first-person shooter RPG. Within the game there are three classes and two subclasses for each. At the start of the game you'll get the basic subclass, the other is unlocked through playing the game.
Within each subclass there are skills and specializations for your character. These allow you to customize your character's playstyle the way you want it.
In this overview I'll give a brief description of each class and subclass, as well as how to unlock the advanced subclasses.

Unlocking Advanced Subclasses:

Unlocking the advanced subclasses is actually really simple. All you need to do is get one character to 15 to unlock the advanced subclasses for all characters. This means, until you hit 15 on your first character you should just grind out the levels through the available means. Even if you decide the current class isn't the one for you, it's more efficient to still hit 15 on it.

Classes and Subclasses:

In this section I'll cover a brief description of each class and both of its subclasses. For in depth descriptions of what the subclasses offer, take a look at the links within their descriptions below.
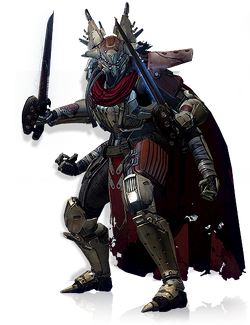
Hunter:
The Hunter class focuses primarily on mobility and precision. In an intense battle, the Hunter is designed to pick a spot, fire off a few rounds, and move to a new location. This makes them very well mated with the Scout Rifle, Sniper Rifle, Rocket Launcher build. You never want to be caught in one place for very long as a Hunter.
Gunslinger Subclass:
The Gunslinger subclass is designed to focus on precision over all else. Several active and passive abilities are modified through use of precision. Passives like Chain of Woe and the Throwing Knife ability modifier Knife Juggler really increase the killing potential of the Gunslinger. As a Gunslinger you'll want to stay mobile since you have a really low armor rating.
Bladedancer Subclass:
The Bladedancer subclass is a highly mobile melee fighter. You'd play this spec much like an assassin. Blink Strike and Arc Blade make a deadly combination for any situation. With the Fast Twitch modifier, Blink Strike's cooldown is reduced to 5 seconds, allowing for almost non-stop melee killing.
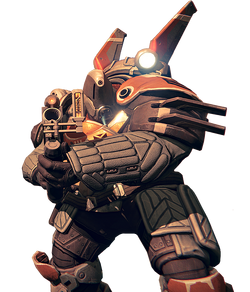
Titan:
The Titan is basically the tank class of Destiny. Titans have a high armor rating, but lack significant mobility. As a Titan you'll be in the middle of the fighting taking hits for your allies, blocking damage, and keeping the enemies focused on you.
Striker Subclass:
The Striker subclass focuses primarily on melee and short-range combat. Fist of Havoc is really useful to get you into the fight while doing massive area damage. With the addition of Storm Fist, you can spec for Storm Fist resets or another area damage attack through your ability modifiers.
Defender Subclass:
The Defender is the tank subclass for Titans. With a large area shield created from Ward of Dawn and Suppressor grenades, your fireteam will survive fights that otherwise seemed impossible. The melee attack Disintegrate also grants the Defender a barrier that soaks up damage if you kill the target. Defender's are a literal wall that other players can hide behind during combat.
Warlock:
The Warlock class focuses more on your use of grenades and your Special. When played to its fullest potential, you'll do an immense amount of burst area damage.
Voidwalker Subclass:
The Voidwalker subclass focuses on the ability to throw grenades out more often. Utilizing Energy Drain, the Voidwalker's melee ability, you lower the recast timer of your grenades. The Voidwalker also uses the Special Nova Bomb which does massive area damage, for use on clustered enemies.
Sunsinger Subclass:
The Sunsinger gains access to a unique utility Special that boosts your damage resistance, skill recharge speeds and melee damage for 1.3 seconds. With the Fireborn modifier, you can even come back from death by activating the ability. This subclass makes your Warlock a powerful brawler during your Special.
This wraps up the general overview of the classes and subclasses. For a more in depth look at the individual subclass options be sure to click the links above.
Originally Published Sep. 11th 2014

Saturday, September 13, 2014

Destiny tips and tricks guide

reposted from gosunoob

Destiny tips and tricks guide

destiny tips Before you jump into the world of Destiny and start fighting for survival in Story Missions and Crucible matches, we prepared a comprehensive list of things you should know beforehand. The aim of these tips is to help you find general and advanced answers about gearing, weapons, pvping, leveling and much more. If you know any additional tips that we missed please share them with us in the comment section below.

General tips

  • During the character creation choose whatever race you like. The differences between races are entirely cosmetic, with no hidden additional bonuses related to any race.
  • The races have the same four emotes Wave, Point, Sit and Dance, but each race performs Dance and Wave emotes differently.
  • The second subclass unlocks at level 15.
  • When you get to rank 15 on any of your characters, you unlock the subclass for all future characters immediately (thanks Sir_Pillows)
  • You can deposit your items in Tower’s Vaults and share them between your characters.
  • At the beginning your character doesn’t have access to special attacks, double jumping or grenades.
  • You don’t sell items in shops, you disassemble them in your inventory. During this process you’ll receive some materials and Glimmer currency.
  • There is no penalty if you die during a fight. Even your super ability timer is not affected.
  • You can interact with players if you target them and click the right stick. It will open a menu where you can invite players to Fireteam, Inspect Player, View Profile or Report Player.
  • Your Fireteam privacy settings can be changed under the Roster Tab in pause menu.
  • Press triangle on PlayStation or Y on Xbox to access upgrade submenu.
  • Participating in public events will give you great rewards and vanguard reputation
  • If you loot Encrypted Engram gear item, take it to the Cryptarch at the Tower to decode it. You can also save a few Engrams and decode them while leveling.
  • Open your inventory and learn how to compare and quickly equip new gear
  • Look for coral-metallic plants Spin Metal, while exploring. You can trade them for reputation points or upgraded kits in the Tower.
  • You get an audible cue when near chests / plants before you see them. It’s like a light screeching/beeping sound. You can hear them through any wall/object
  • Completing exploration missions rewards you with Vanguard Marks, that can be used for buying Vanguard gear
  • The easiest way to get into cover is by hitting crouch button (O/B) while running to do a slide (list of Destiny Controls on PS4, XboX, PS Vita and Alternate Control Schemes
  • When crouching in cover behind an object, holding down the Aim-down-sights button will allow you to quickly peek over the object and fire from cover. Realising the button will place you safely back behind cover.
  • Once you hit level 6 you’ll unlock Bounties, challenges that can be bought from Bounty Vendor in Tower. You can choose between Crucible or World challenges, with Crucible Reputation or Vanguard Reputation rewards respectively, depending on which type of Bounty you completed.
  • Do equip gear that you want to level when turning in bounties. The XP also applies to items allowing you to rapidly gain their special abilities.
  • Strikes are missions for 3 players, with much harder enemies and bosses.
  • If you kill your enemy with your super ability, your teammates can collect “Orbs of light” and recharge their super abilities faster.
  • You can jump off the Tower’s balcony (and die), but you can also be pushed off!
  • Use your vehicles to move quickly around the map.
  • Use Redemption Codes to unlock 25 different Emblems, Shaders and Destiny Grimoire Card for your collection

Weapons

  • Tapping the weapon swap button (Triangle/Y) allows you to switch Primary and Special weapons.
  • Switching to Heavy weapons occurs when you hold down the swap button.
  • When you have your heavy weapon equipped and you tap the change weapon button you will then equip your primary weapon, regardless of whether you had your primary or special weapon equipped previously. To switch from your heavy weapon straight to your special, double tap the change weapon button.
  • Don’t rely only on one weapon. Combine your guns, grenades and melee attacks for the best fighting strategy.
  • When you start a Crucible match you only have ammo for your primary weapon and a few shots with your special weapon, so keep an eye out for Ammo Creates.
  • The announcer gives a 10 second warning before heavy ammo crate drops. Look for a purple icon, try to grab it, and gain a huge advantage over the competition.
  • Grenades are limitless but you have to wait for them 1 minute to respawn. You can reduce this timer through weapon/armor upgrades, certain skills, and increasing your discipline stat.
  • Special (green) and Heavy (purple) Ammo Creates can be shared between nearby teammates.

Achievement / Trophy Tips

  • There are 41 confirmed Achievements (Trophies) in Destiny.
  • Bane of the Emperor Kill 25 Cabal with precision shots in 1 mission without dying.
    Don’t try to complete this achievement before obtaining Superior Sniper Rifle.
  • Hunter Killer – Kill 100 Hunters in PvP
    Hunters are very fast, but they are not faster than a rocket. Collect heavy ammo and use a Rocket Launcher to kill them.
  • Blink of an Eye Kill 5 enemies in 3 seconds
    Find a group of enemies and use explosive attack.
  • Inspector – Inspect another player
    Target a player and press the right stick. It will open up a menu where you can Inspect Player.
  • Dragon Slayer – Kill a champion of the Dark
    Defeat Riksis during the Restoration mission on Earth

Crucibles

  • At level 5 you’ll unlock Crucibles upon completing a mission “The Last Array“. There is a rumor that at launch, you’ll be able to play pvp from the level 1, but it’s not confirmed yet.
  • You can access Crucibles in Orbit, by selecting “choose destination” then mouse over Crucible
  • Before you rush into the first Crucible match visit the Tower and collect bounty quests. Their objectives can be completed during your PvP matches.
  • You get Crucible Marks for completing Crucible matches, that can be used for buying Crucible gear.
  • In the upper left corner members of your Fireteam appear as green dots, enemies as red dots. When a red dot starts flashing it means that an enemy is within 6 meters.
  • If a player dies with Heavy ammo, he drops it for the killer.
  • Control Crucible matches last 10 minutes or until the first team reaches 20,000 points.
  • Killing with a headshot, super ability, heavy weapons, or vehicle will add additional points for each kill.
  • Don’t forget to use your Supers, they are devastating in Crucible.
  • The Super ability timer can be sped up by helping your team: Kills, Assists, and neutralizing and capturing Control points all speed up your timer.
  • Each Zone your team holds gives your team an additional 50 points per kill. Two zones held gives a bonus 100 points per kill, and holding all 3 zones gives 200 points per kill.
  • The standard Control Crucible playlists disable level advantages between players to ensure a fair fight.
  • In Iron Banner, a timed playlist, players can test out their best guns and gear.
  • Hop on a Pike and use it as a powerful weapon.
  • Keep an eye on the condition of your vehicle.

Raids

  • You’ll not get any objectives or waypoints for raids, you have to figure everything out for yourself.
  • For the majority of Raid encounters, you’re going to need to work as a group
  • Raids have two difficulty levels: Normal and Hard. Upon completing a Raid on Normal, players can attempt the Hard-mode version of the Raid.
  • Normal mode is about learning the mechanics, working together as a team and building strategies to overcome the encounters.
  • Hard-mode encounters leverage an even harsher death penalty than the Normal modes.
  • Your progress through the Raid is reset each Tuesday at the Weekly Reset, thus, you don’t need to complete all Raid activities in one-go.
  • You will be able to run the raid as many times as you want per week on the same character, but you can only receive loot once per week per character.
  • Each of Destiny’s nine weapon types has a Legendary version that has been created specifically for the Raid, and each class has an entire set of gear to chase across the two Raid difficulties
  • The loot you get is private to you.
  • The Vault of Glass can be broken into beginning on September 16th, assuming you’ve achieved level 25.

Friday, September 12, 2014

Equip weapons or gear with locked upgrades before handing in bounties

Reposted from reddit

Turning in bounties generates XP which can instantly unlock upgrades on weapons, gear, and your character.  Is a great way to quickly level up your subclass when you reach level 15.

Thursday, September 11, 2014

Destiny: Weapon Slots and Available Weapons


Reposted from gameskinny, edited down for brevity. 
 
by

Destiny offers a wide variety of weapons that fill one of three slots. The three slots available for weapon equips are Primary, Special, and Heavy.

Primary Weapons:


Hand Canon: These heavy powered handguns have the highest damage capacity of a single shot. Unfortunately, Hand Canons sacrifice fire rate, accuracy, magazine capacity and ammo capacity. This gun works well for frontline Titans. Auto Rifle: This is the opposite end of the spectrum. This gun has the highest average fire rate, magazine capacity, and ammo capacity. The recoil effect of the Auto Rifle affects the accuracy, but not as badly as that of the Hand Canon.
Scout Rifle: This is the most balanced primary weapon. It has above average range, accuracy, and damage. This is the perfect gun for a Hunter. This gun sacrifices magazine capacity and total ammo capacity. Pulse Rifle: This gun is about halfway between a Scout Rifle and an Auto Rifle. From what I've seen on the Pulse Guns I've had, each shot fires three times at about the rate of a Scout Rifle equivalent. It has less damage than the Scout Rifle and more accuracy than the Auto Rifle.

Special Weapons:

Sniper Rifle: The range is higher than the Scout Rifle, while the damage is higher than the Hand Canon. The downside to the Sniper Rifle is the low magazine and ammo capacity.
Fusion Rifle: This is basically a charged energy gun. This weapon has a charge time when firing, as well as a large recoil. If it connects it does heavy damage, but it's not very effective against mobile or close range targets.
Shotgun: What this gun lacks in accuracy it makes up for with a large scatter radius. It's best used in close proximity to insure all hits count. A full hit is decently powerful, but each individual hit is about on par with a single bullet of a Pulse Rifle. Frontline Titans have the potential to make the best use of this weapon allowing for Hunters and Warlocks to keep their distance.

Heavy Weapons:


Machine Gun: While you don't have the ammo capacity of the Auto Rifle, the magazine Capacity is greater. This gun is great for sustained damage when you find an opening, assuming you can keep it on target. It's very hard to aim to to the high fire rate and low stability.

Rocket Launcher: By far the most destructive weapon I've run across. This weapon has a very low ammo capacity, but makes up for it with heavy explosion damage. To put into comparison, my Rocket Launcher does about 5 times the damage of my Hand Canon on my Titan, this is only calculating a single hit. With the blast damage, one shot does the work of several shots from other guns.
Originally Published Jul. 18th 2014 
 

Wednesday, September 10, 2014

Destiny Quick and Dirty Beginner's Guide

Resposted from gameskinny

[gtdroptop: I've edited this down for brevity, check out the original for anything you'd like to know more about]

Destiny Quick and Dirty Beginner's Guide


Everything you need to know to get started in Bungie's Destiny!
by

Destiny is more than your average shooter. There are classes, special abilities, leveling, exploration, and more. Things seem daunting at first, and players new to the game might wonder about some of the things you can do in the game.

This guide will cover the basics of Destiny including:
  • Gear - The types of things you can equip.
  • Controls - Helpful tips for doing things in Destiny.
  • Classes - Each class and the differences between them.
  • Tower - What it is and everything important about it.
  • Game Modes - Explanations of each game mode currently available.

Gear

There are 8 different gear slots. For details on the weapon options visit the Destiny Weapon Options guide.
  • Primary Weapon - Your main weapon and what you sue the most/have most ammo for. (Dropped ammo is White)
  • Special Weapon - Secondary weapon that's more powerful and has less ammo than your primary. (Dropped ammo is Green)
  • Heavy Weapon - Special weapon that does a lot of damage and has low ammo. (Dropped ammo is Purple)
  • Helmet 
  • Gauntlets 
  • Chest Armor
  • Leg Armor
  • Class Bond - Special visual item unique to your class.
Sometimes you'll loot gear that looks green and says Encrypted Engram. You have to decode them to see what the gear is and use it. Do this by going to the Cryptarch at the Tower.

Grimoire Cards

See gameskinny if you're interested, but these are not critical to gameplay.  Venisia wrote a Destiny Codes article for free grimoire cards and other goodies.

Controls

Most things are simple and natural to anyone who has ever played a first-person shooter. I found a few things that people should know however that aren't clear. 
  • Aim down the sights of your gun (using left trigger) when you can. For weak enemies it doesn't make a big difference, but you will get significantly more accuracy while aiming down the sights.
  • When you unlock heavy weapons, hold the weapon swap button (Y) down to switch to it.
  • Click the right stick when targeting someone to interact with them.

Classes

There are 3 classes in Destiny. They are: Titan, Warlock, and Hunter.
  • Titan is like your soldier class. They have more defense than other classes and the ability to shield allies.
  • Warlock is like a Mage class. They can glide and use magical abilities to destroy their foes.
  • Hunter is the rogue/thief of the game. They use knives, attack quick, and can do a lot of damage in a short amount of time.

Tower

This is the social space/vendor area of the game. You walk around in 3rd-person and with your helmet off to show you beautiful face. You can also meet with other people to form fireteams before adventuring or doing Crucible. I'll explain the places listed on the map below.


  • Vaults - You can deposit gear in here to give you more room in inventory. This is also shared for your account, so you can give items to your other characters
  • Cryptarch - Where you go to decode and Encrypted items you get
  • Postmaster - When you get a quest item to turn in, you go here
  • Gunsmith - Sells guns

Game Modes

  • Story - Missions that explain the game's story and progresses you through the game.
  • Patrol - Free-roam areas that also have missions you can complete if you choose. (Awards Vanguard Reputation)
  • Strike - These are missions for 3 players. The enemies are harder than normal and has very strong bosses.
  • Crucible - The competitive multiplayer of the game.  [NOTE: Bada Bing will *not* be playing crucible.]

Bounties

See gameskinny if you're interested, but these are not critical to gameplay. 

Destiny Companion App

See gameskinny if you're interested, but this is not critical to gameplay. For more info, check the Destiny App description.
Originally Published Jul. 18th 2014

Tuesday, September 9, 2014

Clan night tonight. 9pm PT. Destiny.

I may be on as early as 8pm, so ping me if you're on early.

Thursday, September 4, 2014

Official Destiny Live Action Trailer – Become Legend


Tuesday, September 2, 2014

Clan night tonight. 9pm PT. X1 Titanfall.

Title update release today. May be the last week to play Titanfall though...